Preparations: Fuel systems are under pressure. It is necessary to relieve the fuel system pressure before beginning work on the fuel system. Relieving the pressure can be done by removing the fuel cap.
- Locate and remove the fuel pump fuse from the fuse block.
- After the fuse is removed, start the engine and let the engine consume the remaining gasoline in the fuel lines. The engine will stop when remaining fuel is consumed.
- Once the engine has stopped, crank the engine for three seconds to relieve any possible remaining fuel pressure.
Disconnect the vehicles negative/ground cable at the battery and secure it so that it will not accidentally make a connection while replacing the fuel pump.
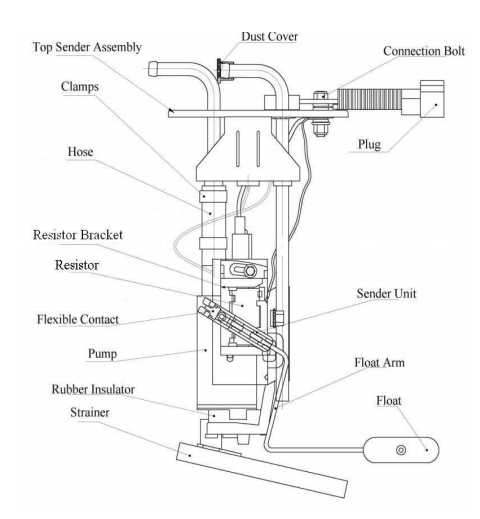
How to Install Electric Fuel Pump